

FAU Infrastructure
Most online-services at FAU need a user-registration. But before you are able to utilise it, you have to unlock it at the regional datacenter RRZE:
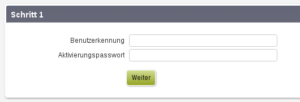
1. Visit http://www.idm.fau.de and choose Activate IdM-ID with activation code.
2. follow the instructions on the page.
Immatriculated students receive the activation letter with a unique code from the Student Office. It is sent to the student address as soon as the tuition fee has been paid.
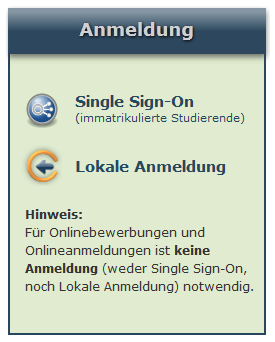
1. Open the page myCampus: http://campus.fau.de/
2. Choose your logon variant: Single-Sign-On (SSO) or Local: The advantage of SSO is that you can log on to other portals like StudOn, etc. at the same time, while local logon is restricted to meinCampus.
3. After the login you see the following picture:
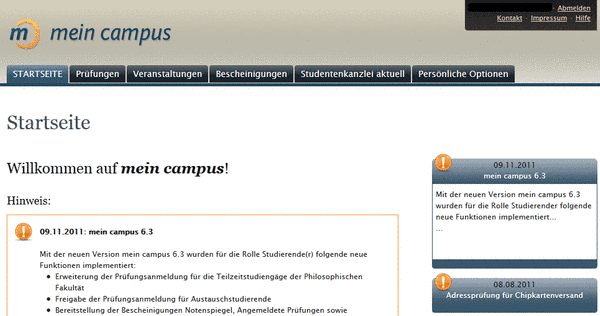
Most of meinCampus is self-explanatory, so here is just a brief summary of what you can find in which tab:
Home page: Here you will find news that either concern the system itself (version updates, etc.), but also information about the exam registration period, in which you have to/can register for your exams, and about the re-registration at the end of the semester (= transfer of the semester fee for the next semester so that you can continue studying)
Examinations: Here you can find everything about examinations
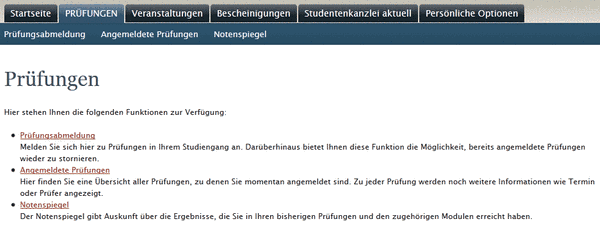
Sign-in & Sign-out This is where you sign in/out. Registrations are only possible during the exam registration period. Cancellations are usually possible up to 3 days before the exam.
Registered examinations: self-explanatory
Note mirror: Here you can view your notes and your current cut. However, only completed modules are counted towards the cut.
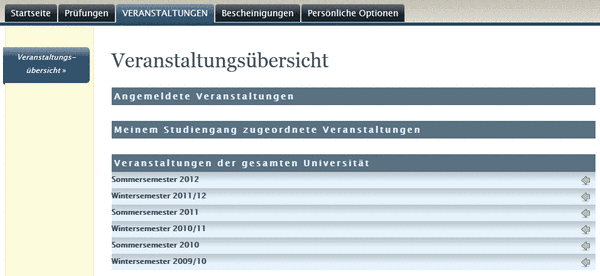
Events: Some courses/departments/faculties of the university use this area of meinCampus to register for certain courses. If this should be the case for you, you will usually be informed about this via the lecture info in the Univis or by the lecturer.
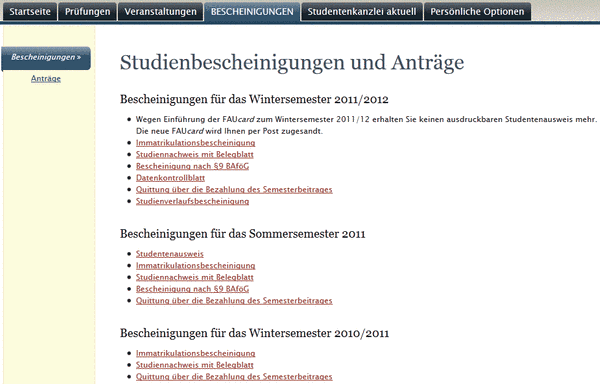
Certificates: Here you can find all kinds of certificates you need as a student (e.g. certificate of enrolment). You can also find applications (e.g. for leave of absence or change of study programme) here.
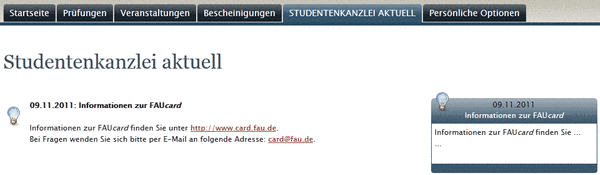
Studentenkanzlei AKTUELL: Under this point you will find information which the Studentenkanzlei publishes on myCampus.
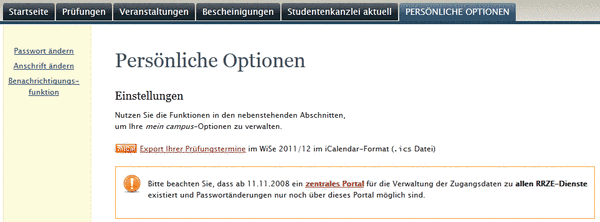
Personal: Under this point you can change your personal data (password and address). If you change your password, you will be forwarded to the IdM (Identity Management System), because passwords are managed centrally at the University of Erlangen. You can also activate a notification function here, so that you will be informed by e-mail when one of your exams has been classified as completed on myCampus (i.e. the grades have been published)
That’s it for the meinCampus portal. As you can see, it’s not so complicated but rather intuitively designed. However, if you still have difficulties, just have a look at your FSI. They can help you further.
StudOn
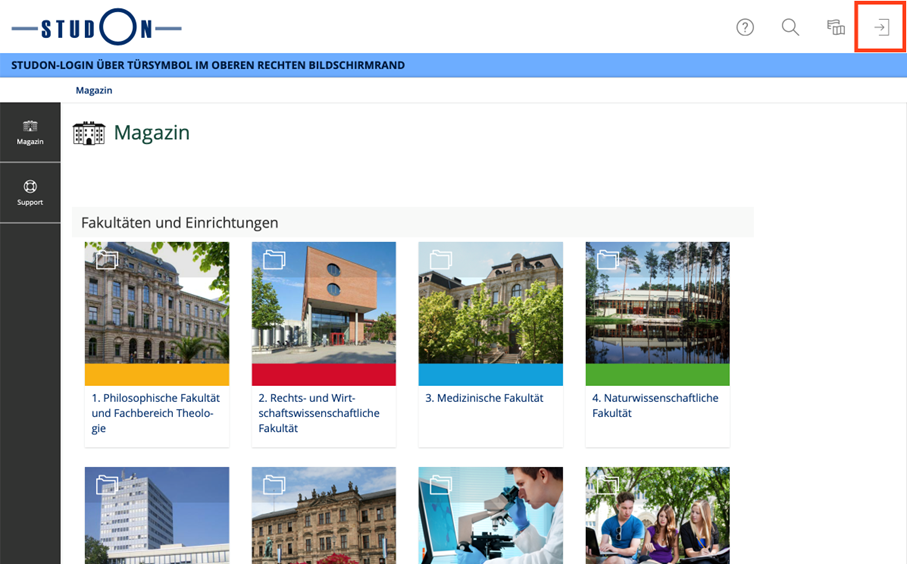
1. Open the page StudOn: http://www.studon.fau.de
2. Select the door icon at the top right of the screen to log in.
3. Select “Register with StudOn via Single Sign-On” for the registration option. The local login is not for students, but only for teachers and guest students. As with the Campus, the SSO will log you in for all central portals.
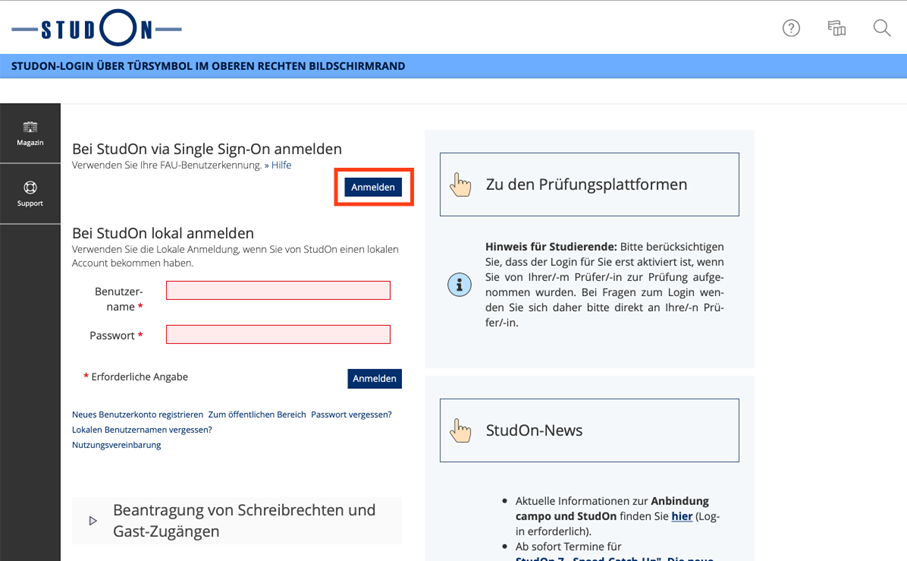 You will be redirected to the IdM portal to log in. Now enter your user data as defined/assigned during the user ID activation.
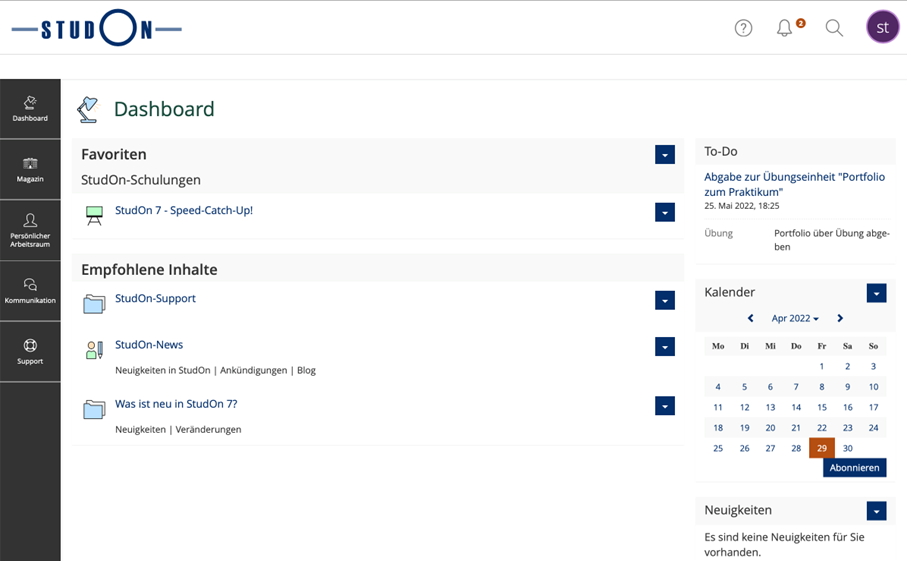
4. After logging in, you will see the following picture:
 Most of StudOn is intuitive, so here is a brief summary of what you will find under which tab:
Dashboard: Here you can find your favourites and recommended content. On the right, you will see to-dos such as exercises to be handed in, your personal calendar and news. Under News you can see, for example, when lecturers upload new files to the courses. Attention: Only the news for your favourites are displayed here! In the next paragraph you will learn how to add content to your favourites.
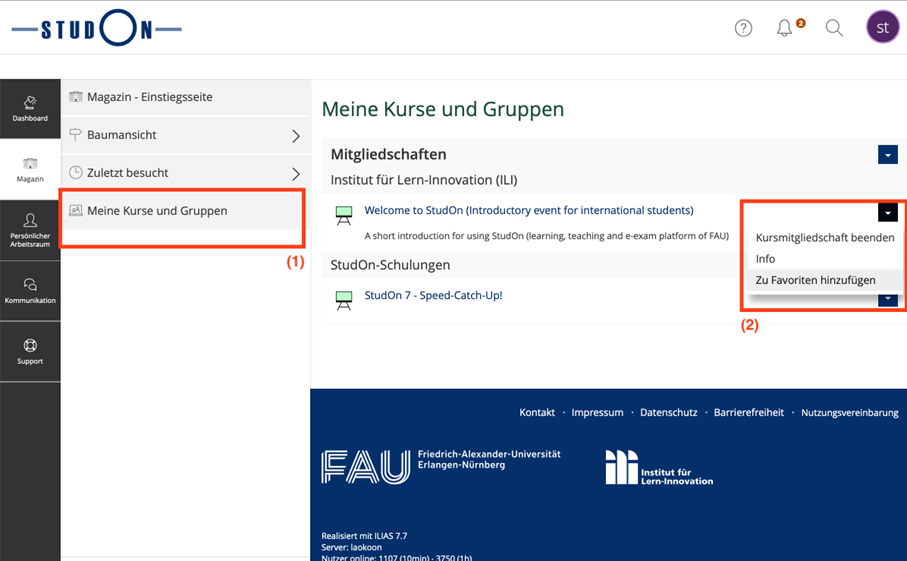
ourses and groups”: In the main menu on the left you can access all your courses and groups for which you are registered on StudOn via “Magazine” > “My courses and groups” (1). Via the ▿-action menu (2) you can add the courses and groups that are currently important to you to your favourites so that they are displayed in the dashboard immediately after logging in.
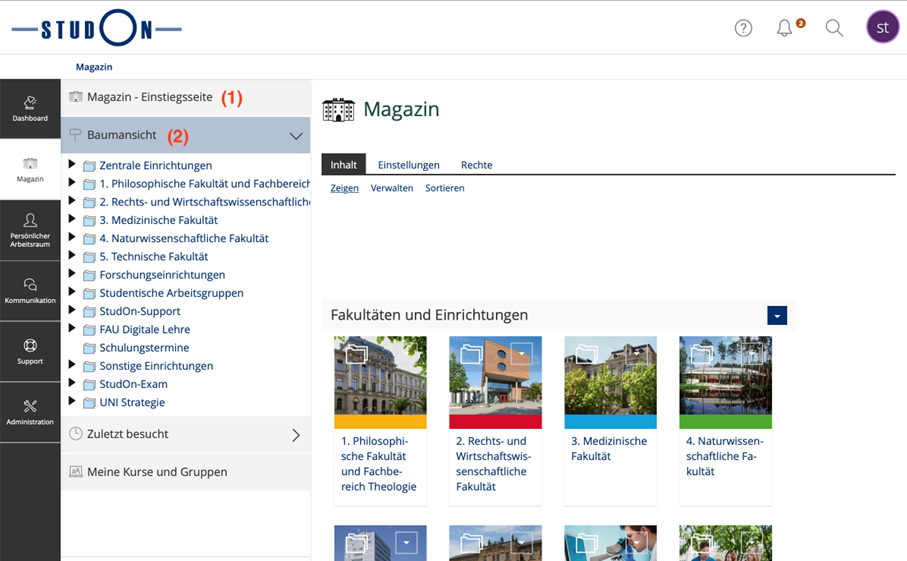
 Magazine – introductory page: You can also access the introductory page of the magazine via “Magazine” (1). Here you will find all the courses offered by the entire FAU. The courses are structured as follows: The courses are always listed under the faculty/department that offers the course and not under the department where you mainly study! This mistake is often made!!
For example, you will find a mathematics lecture in the category of the Faculty of Science although it is an engineering lecture for the Faculty of Technology.
Alternatively, you can also use the convenient tree view (2) for navigation.
 Top Bar (top right menu): No matter where you are on StudOn, in the Top Bar at the top right you always have access to the StudOn Help (1), the Notification Center (2), where you can check your mails, the Search (3) and your profile picture/avatar (4), where you can access your personal profile and user settings.

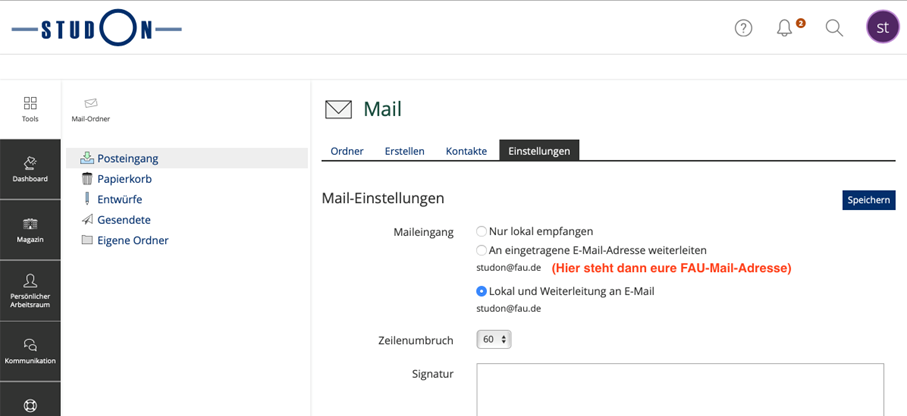
Mail: You can also access your emails via “Communication” in the main menu on the left. If your lecturers send e-mails to you via StudOn, you can access them under this menu item. You can also send e-mails to other students or lecturers yourself here. In the settings you can also choose to have the emails forwarded to your FAU email address. We recommend “Local and forwarding” so that the emails can still be accessed in StudOn, but are also forwarded directly to you. This is definitely recommended if you check your e-mails more often than StudOn (this is usually the case for everyone).
5. Join a course. But how do you join a course now? This is also relatively intuitive. You look for the relevant course (either via the search function or via the tree view in the magazine) and click on “Actions”.
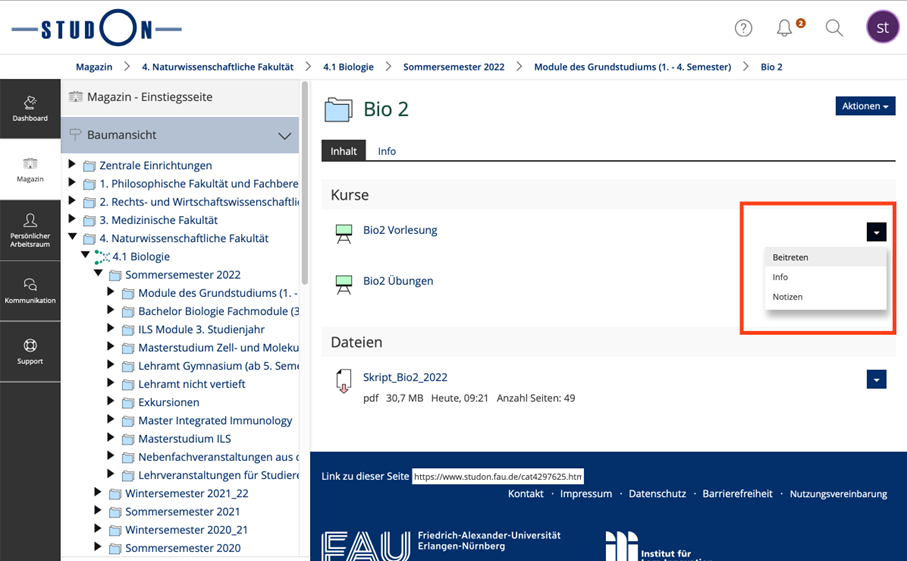 Depending on the course, different options will appear. To be able to join a course, “Join” must appear there:
 If this is not the case, you should contact the respective lecturer.
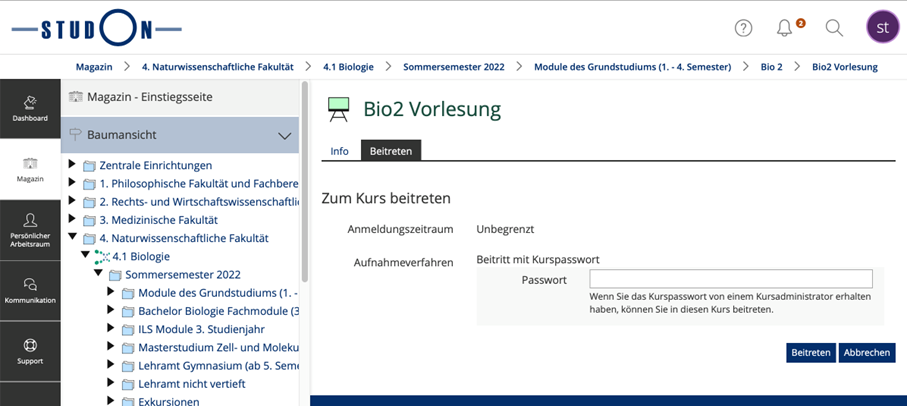
When you click on “Join”, several things can happen:
a) You will be asked for a course password. In this case you need a password, which is usually given in the lectures. If the password was not announced in the corresponding lecture/exercise, you have to contact the course instructor. You can usually find this person in the “Info” tab.
b) You can submit a membership request. It must be confirmed by the course administrator. In this case, you can only wait to be accepted.
c) You can join the course without a password
6. Once you have joined the course, you can view the course materials etc. by clicking on the course. You can do this either under “My courses and groups” or in the dashboard, or directly via the tree view. In this area, everything should be self-explanatory.
7. Course deregistration. If you want to unsubscribe from a course, you can do so easily. Simply call up the ▿ action menu for the relevant course and click on “Cancel course membership”. The same applies to group memberships.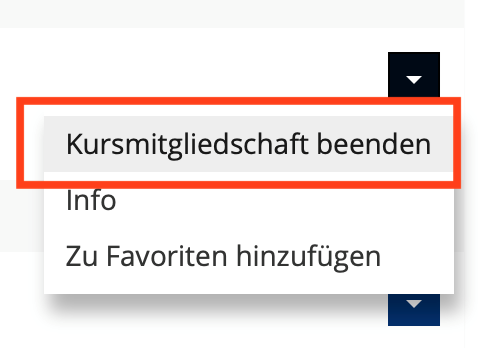
So that’s it for the StudOn portal. As you can see, it’s not all that complicated, but rather intuitive. However, if you still have difficulties, just check with your FSI. They will be able to help you.
University Library
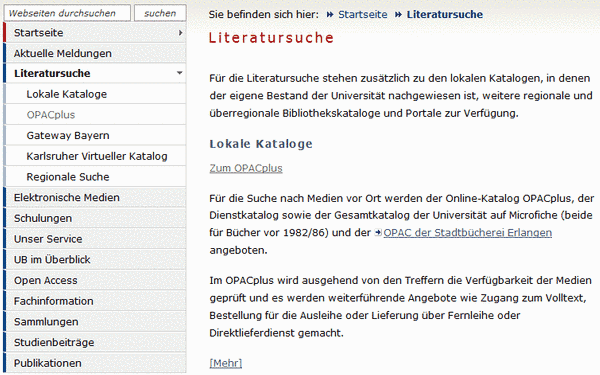
1. Open the page of the University Library (UB): http://www.ub.fau.de/en
2. Proceed to “OPAC plus” (literature search tool of the UB) Literature search -> OPACplus
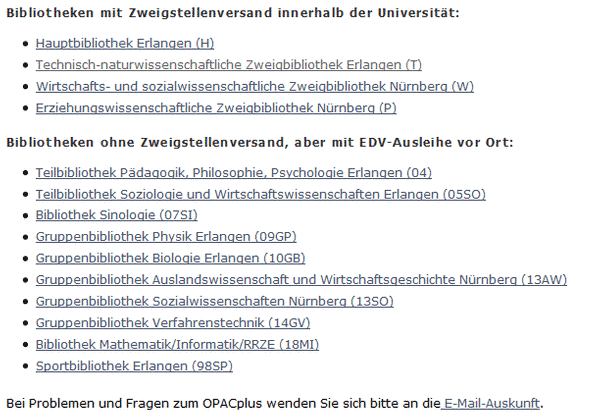
3. Select your desired library e.g. technical-scientific branch library Erlangen (T)
4. Book search : You can enter any details you like. The search itself (“search input”) is relatively self-explanatory. In the lower area there are some additional options available (“Additional search options”, “Search settings”, “Database selection”). There you can specify, for example, in which library the book should be picked up and whether, for example, national libraries (e.g. Bavarian Library Association, BVB) should also be included in the search.
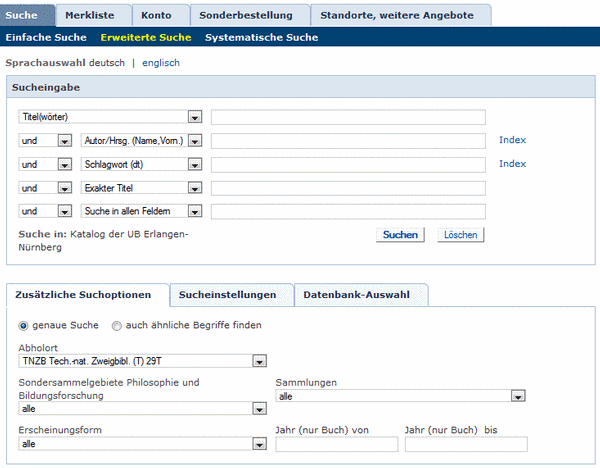
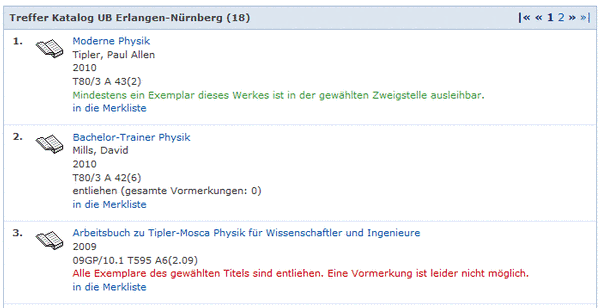
5. the search bar is after starting the search unsually divided into three parts, which are actually all self-explanatory:
In the middle part the hits are displayed. There the corresponding books are listed with their details: Title (e.g. Modern Physics), author (e.g. Tipler, Paul Allen), year (e.g. 2010), library identification (e.g. T80/3 A 43(2)). It also states whether all copies of the book are on loan and if so, whether the book can be reserved (see section A.), so that the borrower cannot extend the loan of this book any further.
In the right and left area you will find options, with which you can limit the search, such as location, subject, year but also possibilities for advanced searches in other databases, as well as saving the hit list in different formats.

Library Identification: This is used to sort the books in the library. You can get more details about the order in the library, if you simply stroll through the library on guided tours of the corresponding branch.
Furthermore the library offers a “virtual tour” (http://www.studon.fau.de/studon/goto.php?client_id=StudOn&target=cat_2874), in which the individual branches are presented in detail. There you will find more detailed information about literature research in many more.
6. Once you have found your desired book, you just have to have your student card ready so that the book can be borrowed in your name. You will also receive a receipt at the loan desk which will show the loan period etc. If you don’t return your book within the time limit, you will have to pay fees, which you want to avoid if possible.
You will now be able to find books and borrow them locally. For those of you who would like to use the online system for reserving and renewing books, the following sections are intended.
A.1 To use the Online functions, you must first go back to the OPACplus page (http://www.ub.fau.de/literatursuche/opacplus/) and select the desired branch library. Then click on the “Login” link in the upper right corner and log in with your user number and password.
You will find the user number on the back of your student card under the bar code. The password is the same as the one you entered when you activated your user ID. After successful login your user number will appear in the upper right corner next to the “Login” button.
A.2 Memorylist
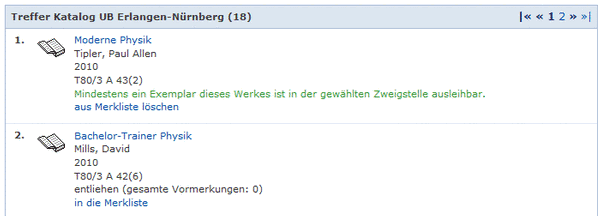
If you are logged in, you have the possibility to create a so-called watch list. In the end, this is nothing more than a memory that you can use to mark books that interest you so that you can find them again later. Marking a book is very easy: Just click on “add to watch list” in the hit list during your search (or in the detailed view of the book).
<div’, div’, div’.
To remove from the watch list simply click on “delete from watch list”. You can then retrieve the watch list under the tab “Watch list” in the upper left corner. The items will be saved there in a temporary list. To make the list permanent, you have to give the list a name on the right and click on “save new list”.
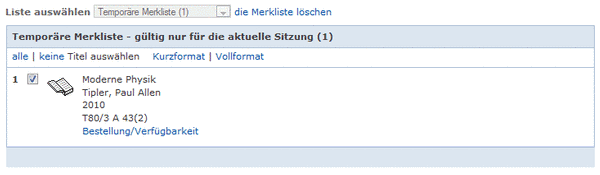
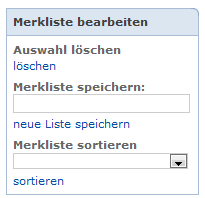
You can now create and delete memory lists. Once again the hint: If you don’t save the list, it will be gone afterwards, because it is only saved for the current session.
A.3 Bookmarking:
In the end, the reservation works the same way: simply click on the title of the respective book in the hit list to get to the detailed display and then start the reservation:

Scroll down in the detail view until you reach “Copies”:
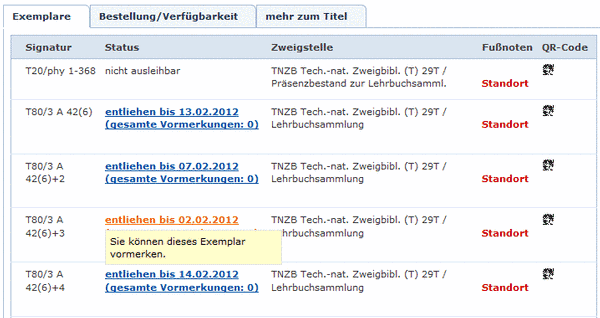
.
And there click on the respective copy on “borrowed until XX.XX.XXXX” (if you go over it with the mouse you get the tooltip “You can reserve this copy”).
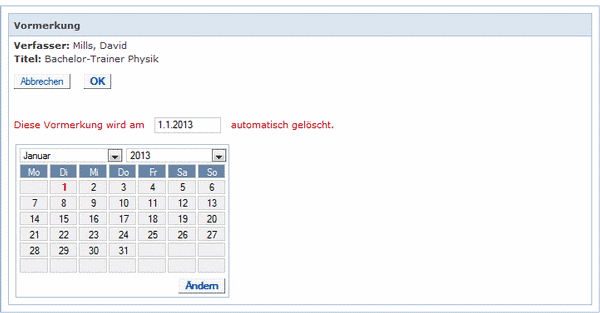
On the next page you will have to confirm the reservation and specify a date on which the reservation will be automatically deleted.
And you have already reserved a book.
A.4 Renew a loan
It is also possible to renew loans via the online system. Simply go to “Account” in the top left corner. Under “Account balance” you will then again find a tab “Borrow (X)”:
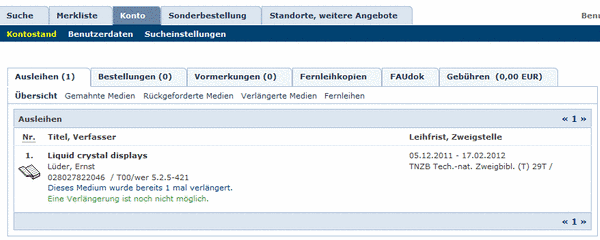
As soon as an extension is possible, this will be displayed and by clicking on “Extend medium”, which replaces “An extension is not yet possible”, you can then extend the loan. If a book has been reserved by someone else, the book can usually not be renewed. The procedure is similar to the reservation process: the renewal must be confirmed again after clicking.
So you are now well equipped to deal with the online system of the UB. For further information you can either take part in the virtual tour (http://www.studon.fau.de/studon/goto.php?client_id=StudOn&target=cat_2874) or contact your FSI, which will surely have tips and advice for you!
Have fun with the literature search!